Add events to a portal
With a portal, viewers can register one time and attend any of the events on the portal. After you select a portal layout, start adding events (segments) to your portal from the Manage Segments tab. You can include Live, Simulated Live, and On-Demand (replay) events and include a description for each event you add.
Note: An event can be linked to only one portal at a time. If you want to add an event that is used on another portal, go to that portal and remove the event first.
To add events to a portal:
- Sign in to the Webcast Admin portal and edit the portal.
- On the left panel, click the Manage Segments tab.
- At the top right of the tab, click Add Segments.
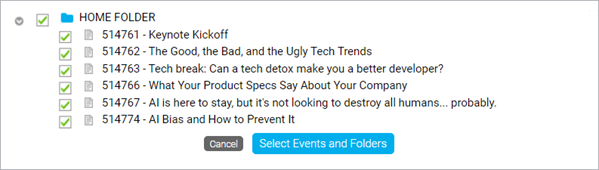
The page lists events that are not linked to other portals.
- Select the events you want to include and then click Select Events and Folders.
The selected events display on the Manage Segments tab under Linked Segments.
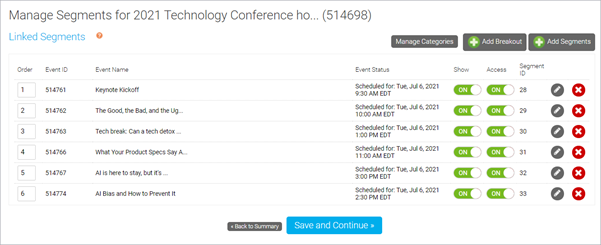
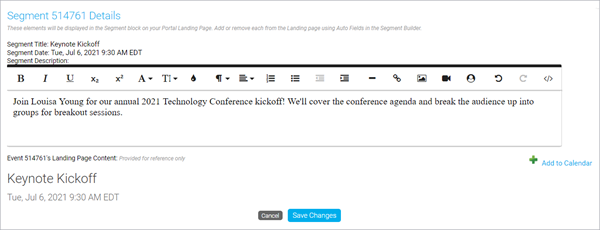
- Click the Edit button next to an event to add a description. The description displays under the title of the event on the portal. After adding a description, click Save Changes.
- Click Save and Continue to save the events to the portal.
Once you've added events, you can sort them into categories and hide or restrict access to them.