Send reminder emails for a converted Simulated Live event
When you convert a Live event into a Simulated Live event or change a Simulated Live event from live acquisition to pre-recorded content, the Event Reminder Emails option is no longer available. To send reminder emails for a converted event, create a follow-up email and use the "did not attend" option to send it to registrants (they haven't attended it yet).
Schedule and send reminder emails
To schedule reminder emails for a converted Simulated Live event:
- Sign in to the Webcast Admin portal and edit the event.
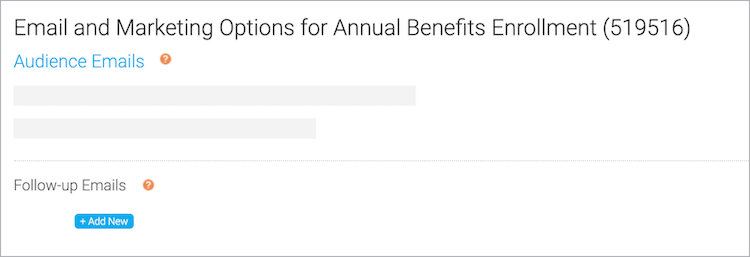
- On the left panel, click the Email & Marketing tab.
- In the Audience Emails section, under Follow-up Emails, click + Add New.
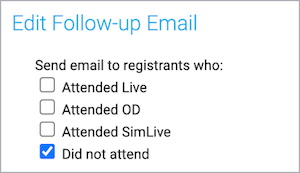
- In the Edit Follow-up Email window, under Send email to registrants to:, select Did not attend and clear the other checkboxes.
- Optional. Delete the placeholder text in the From Name, Reply-To Email, and the Email Subject fields and enter new text.
- At the right side of the text editor, click </> to switch to code view.
- Delete all the placeholder code.
- Paste your custom code or click </> again to switch back to the text editor view to add text, images, or links.
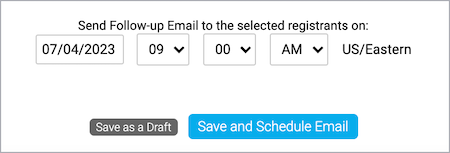
- Click Schedule Email, select the date and time you want to send the email, and then click Save and Schedule Email. You can also optionally save the email as a draft and schedule it later.
- Click Save and Continue.
Preview your work
You should always send yourself the email before sending it to attendees.
To preview the follow-up email:
- In the Webcast Admin portal, edit the event.
- On the left panel, click the Email & Marketing tab.
- In the Audience Emails, next to the email you scheduled, click Edit.

- Under the text editor, next to Send a test email to, enter your email.

- Click Save and Schedule Email.
- Click Save and Continue.