How do I connect and broadcast using the Video Bridge?
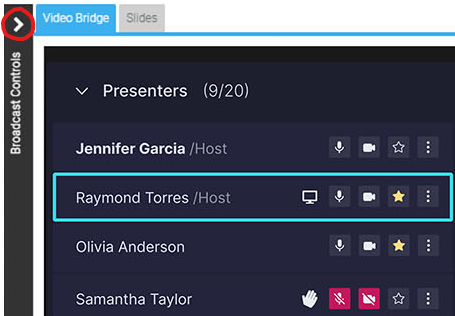
Once presenters have joined the Video Bridge and you are ready to start your event, use the Broadcast Controls section to connect and start your event. In the top left of the Live Studio, click on the > icon next to the Broadcast Controls text to access the controls.
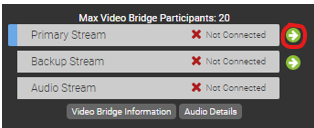
Click on the green arrow icons next to the Primary Stream and Backup Stream to connect the Video Bridge for delivery.
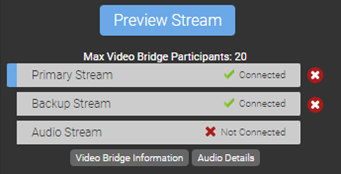
During pre-live procedures, streams should be connected and previewed well before the event is set to start. You will see Connected text to confirm when the Video Bridge has been connected. Click Preview Stream to preview the Video Bridge and prepare to start your event.
A preview of the Video Bridge stream will load in the Broadcast Controls window above. Once an event is connected by the host and is in Stand By mode, recording will begin.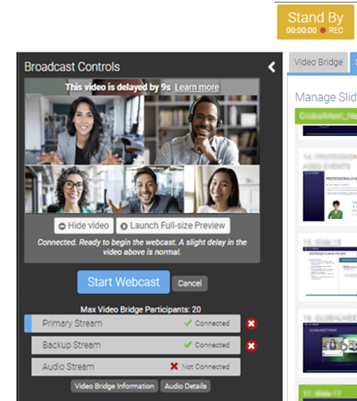
The yellow Stand By indicator at the top of the Live Studio says REC and, upon hovering, shows the following message: "The server is connected and recording but any Audio or Video captured in 'Stand By' mode will NOT be broadcast to your audience or be made available in the automated event archive."

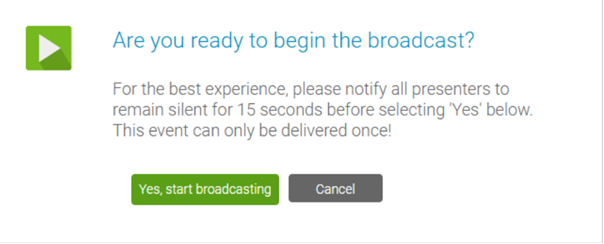
The event host should instruct presenters to each silently count down from 15. At 0, the host will click Start Webcast (and then click Yes, start broadcasting in the confirmation message) to begin the presentation.
Presenters can begin speaking once they see the On Air indicator at the top of the Live Studio turn green. Below the On Air text, a timer will display how long you have been live to viewers.

Once the event concludes, click End Webcast below the Broadcast Controls window to end the presentation.