Jump Points
Overview
Jump Points are timestamps in an On-Demand presentation that viewers can easily navigate to when watching. Jump Points are automatically included for each Slide transition and Overlay Video in a presentation. Jump Points can be enabled for Survey and custom Jump Points can be included as well. Below are instructions on how to view and edit Jump Points (for Admins) and how to access Jump Points while watching (for Viewers).
Setup and Editing
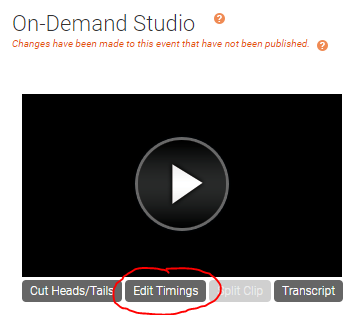
Jump Point setup can be access using the Edit Timings button below the Video/Headshot window at the top of the On-Demand Studio.
In the Edit Timings window, a list of all event timings will display, include Slide transitions and any Surveys or Overlay Videos sent. Jump Points are controlled in the Jump column along the left. A blue arrow indicates a Jump Point is enabled, while a grey arrow indicates a Jump Point will not display to viewers. Jump Points can be toggled on/off using these controls. The name that appears in the Title field is what viewers will see when the access the Jump Points.
To add a custom Jump Point that is not associated with any existing content, click this button in the top right of the Edit Timings window:
Add the time you would like the Jump Point to appear in the Flip Time field in HH:MM:SS (Hour, Minute, Second) format. Add the name for the Jump Point that viewers will see in the Title field.
Jump Points for all Overlay Videos will be added by default. Use the checkbox at the bottom of the Edit Timings window to remove these Jump Points instead.
Click Save Changes to save any changes to the Edit Timings window.
Viewer Experience
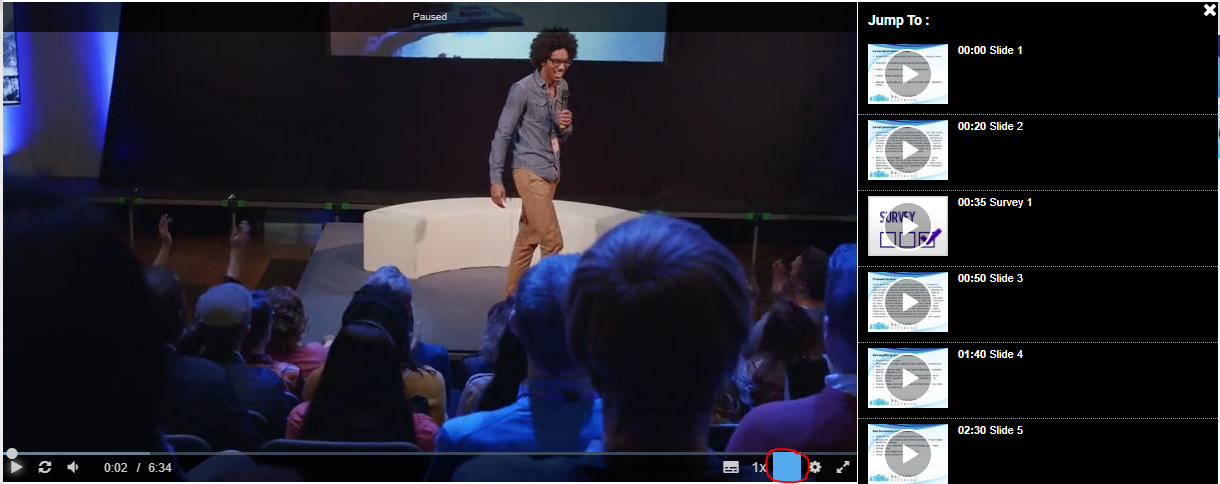
Viewers can access Jump Points by using the button on the lower right of the Video/Headshot window. Hover your cursor over the window to access controls:
A list of Jump Points will appear to the right of the window. Viewers can click on a Jump Point to skip to that point in the presentation.


