Account Settings
Manage account access, including two-factor authentication and single sign-on
- Set up two-factor authentication
- Use SSO to authenticate Webcast Admin access
- Managing a Group License
- How can I update my account details (Username, Password and/or Email Address)?
Set up two-factor authentication
With two-factor authentication, use a secure, app-generated token to verify your administrative account. This is a time-based, one-time password that is generated using an app on your mobile device used to securely sign in to the administrative portal from a previously unverified browser or device.
Recommended apps for authentication include Google Authenticator, Microsoft Authenticator, or Authy.
To turn on two-factor authentication for your account:
- Click on your username in the top right of the page.
- On the My Profile page, under Account Information, your 2-Step Verification status is displayed. Click Manage Settings to update your authentication settings.
- Click Enable 2-Step Verification.
- Enter your password and click Authenticate.
Verification codes are sent to the email address associated with your account to verify future login attempts.
- Click Switch to Token-Based Verification to enable verification via an app. We recommend that you upgrade to our more secure token-based verification.
- Enter your password and click Authenticate.
- Scan the QR code provided with your chosen authenticator app. You will be provided a time-based token, which is entered in the Verification Code field below the QR code.
Once complete, a confirmation message is displayed.
To turn off token-based verification, click Use Email Verification. To turn off two-factor authentication verification, click Disable 2-Step Verification.
Use SSO to authenticate Webcast Admin access
For added security, you can use your organization's single sign-on (SSO) to authenticate access to the Webcast Admin portal. You can require admins to sign in from your SSO login page and also allow them to sign in using their Webcast username and password.
Once enabled, your Team Manager can enable SSO for each admin and select how they'll access the Webcast Admin portal. Allow sign-in from:
- Your organization's SSO login page only; optionally, have the Webcast login offer a redirect link
- Your organization's SSO login page and the traditional Webcast login flow
The Webcast Admin login page detects SSO-enabled usernames and enforces your SSO selection. If an admin tries to sign in using their Webcast login, it either blocks their access, blocks access with a link to your SSO login page, or accepts their username and password.
Notes:
- Single sign-on requires additional setup. If you are interested in implementing SSO for your organization, please contact se@webcasts.com or your sales representative.
- Single sign-on isn't a global setting. Enable it for each admin user.
To set up SSO for a user:
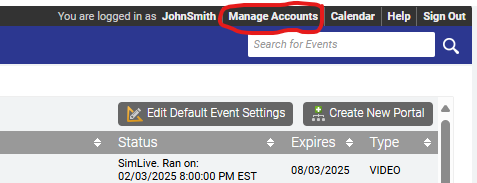
- At the top of the Webcast Admin portal, click Manage Accounts.

- On the Manage Licenses page, under My Team find the admin you'd like to edit, and then under Actions, click Edit (pencil icon).

-
On the Manage Admin page, scroll to the Single Sign On section.
- Select Enable SSO Authentication and choose how to authenticate access to the Webcast Admin.

- Click Save Changes.

Managing a Group License
A License allows for account access to be shared by a group of users at a company. One user can be designated as a Team Manager, which allows them access to mange their license and the accounts of other employees at your company. New accounts can be created to provide each team member a unique login to the platform. Existing accounts can be managed to update access, change permissions or shut down accounts as needed.
If you have been assigned as the Team Manager, use see a Manage Accounts link in the top right of the platform. Click Manage Accounts to access the License setup.
Create New Accounts
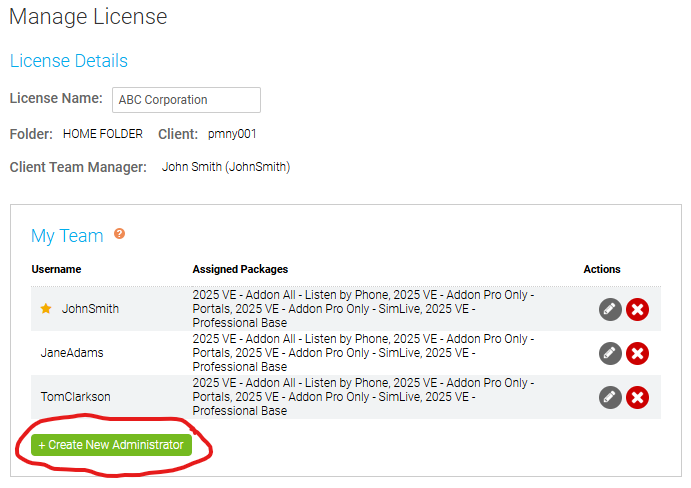
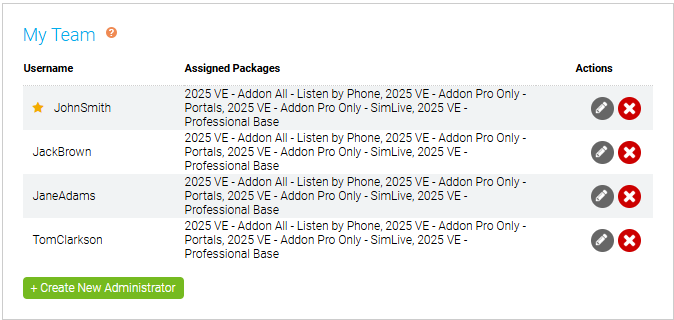
- Under the "My Team" section, click Create New Administrator to create a new Administrator account.
- Depending on the number of users in your team, you may need to scroll down to see this option.

- Depending on the number of users in your team, you may need to scroll down to see this option.
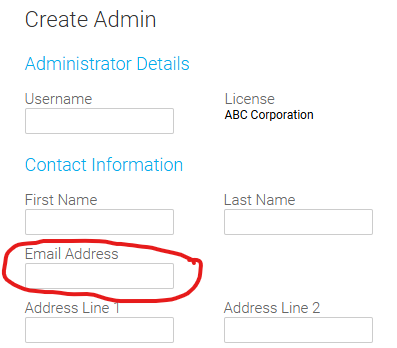
- On the "Create Admin" screen, complete the form to setup a new Administrator account.
- The Email Address field will be used to send system notification related to your presentation. Please use a valid email address.

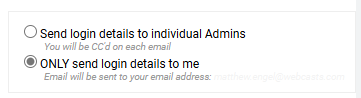
- Along the right, choose how the account details will be sent. You (the team leader) will always be included on the account email.

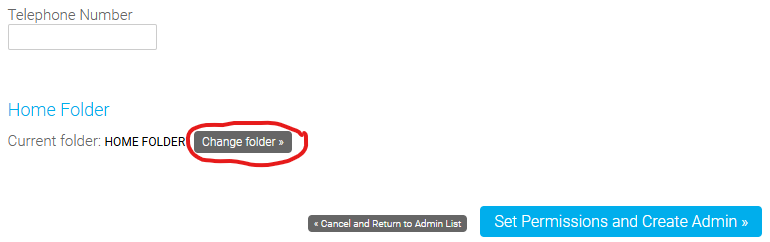
- Under "Home Folder", click Change Folder to choose what folder(s) the Administrator can access.

- The Email Address field will be used to send system notification related to your presentation. Please use a valid email address.
- On the "Manage Permissions" screen, complete the setup to assign permissions to the new Administrator account.
- Next to "Assigned Packages", click Edit to update what packages an Administrator can access.

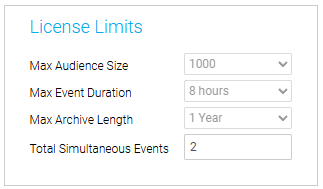
- Under License Limits, the limits for scheduling an event will display. These settings are controlled by the License settings and cannot be adjusted for each user.

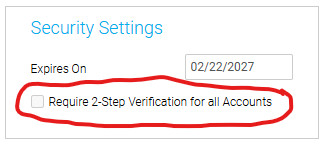
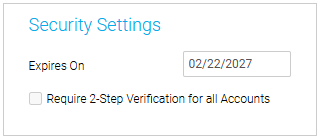
- Under Security Settings, adjust the expiration date or enable 2-Step Verification on an account.

- Next to "Assigned Packages", click Edit to update what packages an Administrator can access.

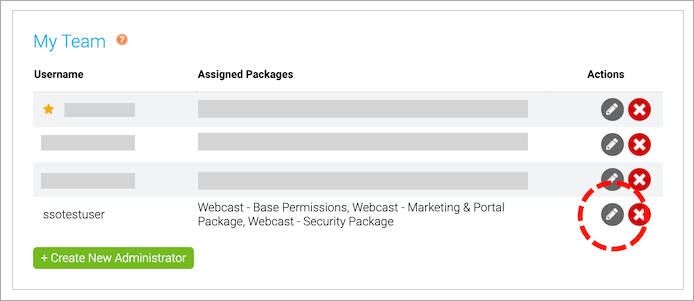
Manage Existing Accounts
- In the "My Team" section, a list of existing Administrator accounts will appear.

- Click the X icon to delete an Administrator account.
- Click the pencil icon to edit an Administrator account.
- On the "Manage Admin" screen, you can update the Username, Password, Email Address and other contact information associated with an Administrator account.
- Note: Be sure to click Save Password (when updating a password) or Save Changes (when updating Username, Email Address or other contact information).
- Click Manage [Username]'s Permissions at the top of the screen to update the permissions available to an Administrator.
- Next to "Assigned Packages", click Edit to update what packages an Administrator can access.
- Under "License Limits", adjust the limits for scheduling an event.
- Under "Security Settings", adjust the expiration date or enable 2-Step Verification on an account.
- Under "Home Folder", click Change Folder to choose what folder(s) the Administrator can access.
- Next to "Assigned Packages", click Edit to update what packages an Administrator can access.
- On the "Manage Admin" screen, you can update the Username, Password, Email Address and other contact information associated with an Administrator account.
Additional Information
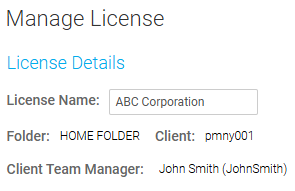
- The "License Details" section will display your License Name, Folder and Client access and the assigned Client Team Manager.

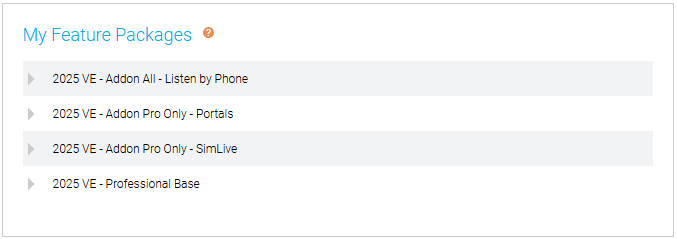
- The "My Feature Packages" section will display a list of Packages available with your License. Click the arrow icon to display the features included with each Package.

- The "License Limits" section will display the audience, duration and archive limits associated with your License.
- The "Security Settings" section will display the License’s expiration date and the 2-Step Verification security option.

How can I update my account details (Username, Password and/or Email Address)?
The Account Details page allows you to access your account information, including the Username, Password and Email Address associated with your account. The Username and Password are used to login to your account. The Email Address associated with your account is used for system notifications, including new event and event archive notifications, slide upload notifications, and password reset requests or requests to unlock your account. It is recommended to use a valid email address to ensure you have access to these email notifications.
After logging into your account, click on your Username in the top right of the platform.

In the Contact Information section, you can update your account information, including the Username and Email Address. In the Change Password section, you can update the Password for your account. The Account Information section allows you to view login details, your account expiration date, an option to be notified of system update and the controls for 2-Step Verification. Click Save Changes to save any updates to your account.